This page guides you through the exact step-by-step process I used to start a blog. If you follow these steps, you can have your blog up and running in under 10 minutes! Click here to start your blog for as little as $3.95 per month and follow my step-by-step guide below to get your blog up and running.
A lot of people don’t realize it, but when you start a blog, you’re not just giving yourself a creative outlet. You’re also starting a business. In essence, your blog is like your own little media company. You’re the editor-in-chief, CEO, founder, or whatever you want to call yourself.
Most people won’t understand this. Sure, they understand that content creators must make money. People intuitively understand that a newspaper or online media company earns money, but when someone starts up a blog, that fact seems to get lost on most people. Instead, people think that a blog is sort of a personal, online journal. It sort of is, but also, it sort of isn’t.
For me, blogging has been something that’s really changed how I think about the world. We all have content that we can create and share with the world. Really, we’re all little media companies in our own right.

Obviously, don’t start up a blog with the only goal of making money. If you do, it’ll impact your writing and you’ll likely create content that just isn’t as good. Plus, earning significant money with a blog takes time – a LONG time for most people. After all, it takes time for anyone to build up their business. But it can happen as long as you stick with it and believe in yourself.
And the really nice thing about blogging?
It’s super cheap to get started. When you think about it, blogging is probably the lowest cost business you can start. Any other business requires a ton of upfront capital, but with a blog, you can get started for just a few bucks a month. Cut out one or two coffees per month, skip lunch one day, or just save a few bucks per week and you’ll earn enough to pay for your blog.
The other amazing thing about blogging is how many people you can reach. Most businesses can only reach the people who happen to be in the immediate area. But with a blog, it’s possible to reach every person in the world that has an internet connection. That’s billions of people. And you only need a small slice of that population for yourself.
A Simple Blog Setup Guide with Step-By-Step Directions
In this post, I’m going to walk you through exactly how to set up a blog so that you can get out there, create content, and be the editor-in-chief of your own little media company.
If you haven’t already, make sure to click here to start your blog. Follow the directions I’ve laid out in this post and you’ll have your blog set up in about 10 minutes.
As a brief overview, here’s what we’re going to be talking about in this post:
- Step 1: Pick A Web Host
- Step 2: Pick A Plan, Blog Name, and Extras
- Step 3: Create An Email Account For Your Blog
- Step 4: Link Your Blog To WordPress
- Step 5: Set Up Jetpack For Your Blog
- Step 6: Choose A Theme For Your Blog
Step 1: Pick A Web Host
When I started my blog, the main issue I had was understanding how to get started. I made a lot of mistakes starting out that made it more of a pain then it needed to be.
The good news for you is that you don’t have to go through that pain because I already did it for you and creating a wireframe for your blog’s layout and design can be incredibly helpful, as it provides a clear structure and direction from the very beginning.
In a nutshell, your blog basically has three parts to it:
- A Web Host (this is the company that hosts your blog)
- A Domain Name (this is your blog URL)
- A Content Management System (this is what you use to write your posts)
When you start your blog, the first thing you need to do is find a web host. A web host is basically the server where your site goes. If you’re serious about your blog, you need to use a web host that you pay for, rather than a free web host, simply because that’s the only way you can have a real, legit blog.
The web host that I recommend is SiteGround. Like a lot of people, I started out using Bluehost, but after a few months, I found that Bluehost didn’t work out all that well for me. My site would go down randomly from time to time, which can be problematic for a growing blog looking to make it big.
After doing a little research, I ended up switching to SiteGround. So far, it’s worked out MUCH better than Bluehost did for me. I’m not sure why Siteground seems to perform so much better with respect to uptime, but it’s a point of pride for SiteGround which they discuss on their page here.
Just look at how sites have done on SiteGround in the past 12 months:
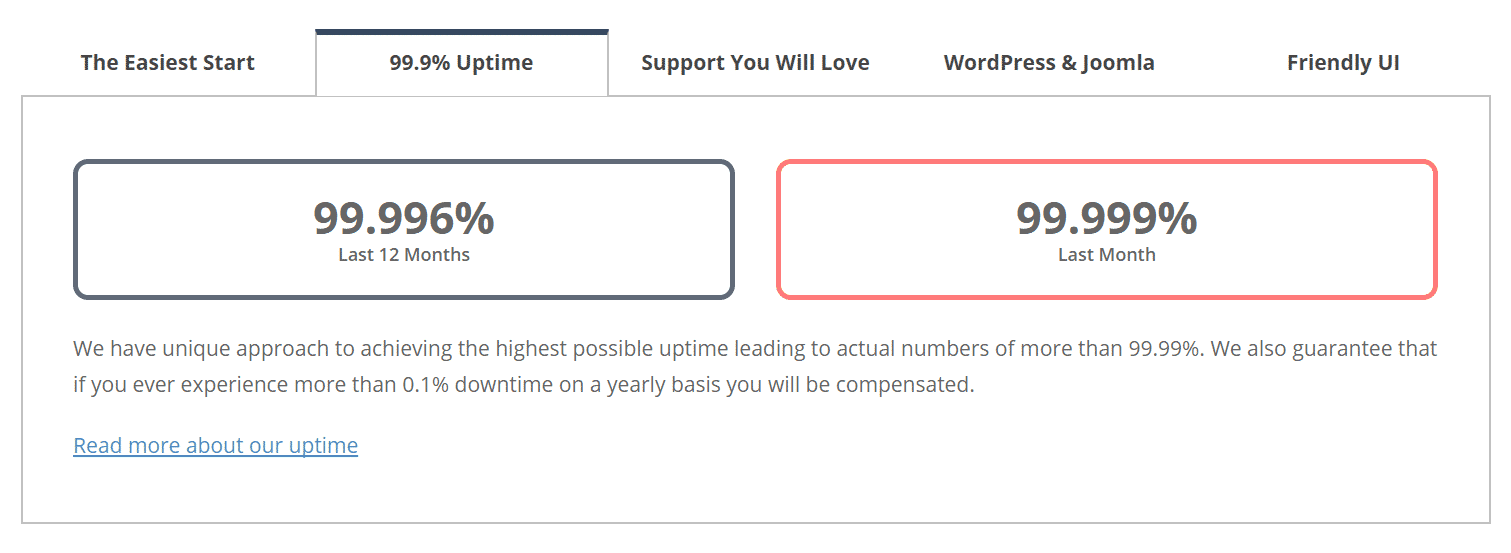
I’ve been with SiteGround now for over a year and based on my experience, I highly recommend starting your blog with Siteground.
In the remainder of this post, you’ll see step-by-step screenshots to help you work your way through the blog setup process.
Note: I’m sure the screenshots below may change over time, but the process should still be similar no matter when you read this. Siteground also has great customer support. Plus, feel free to email me and I will be happy to help you out to the best of my ability!
Step 2: Pick A Plan, Blog Name, and Extras (How Much Does It Really Cost to Start a Blog?)
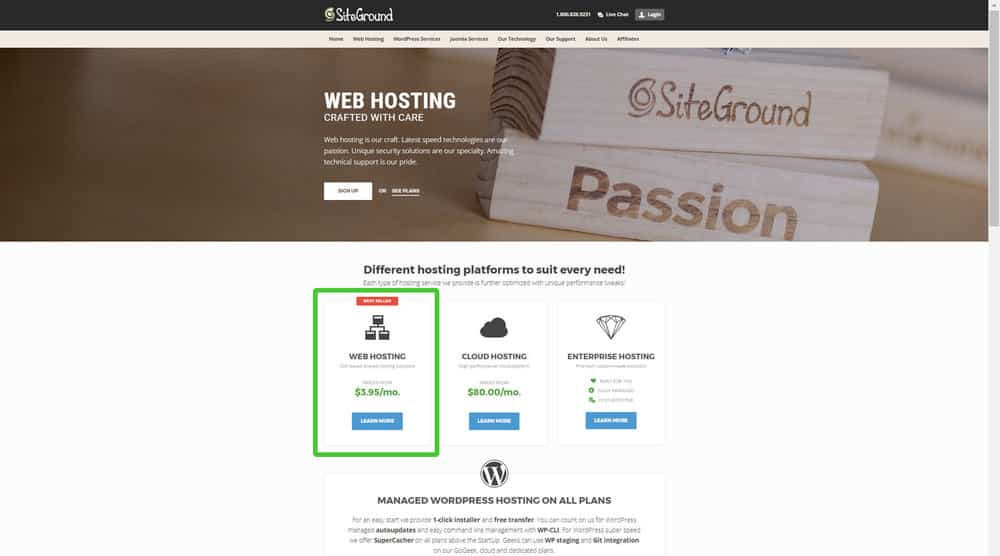
To start your blog with SiteGround, you’ll first want to select the Shared Web Hosting option (as shown below):
Next, pick the StartUp Plan at a cost of $3.95 per month. The page to select the StartUp Plan will look like this:
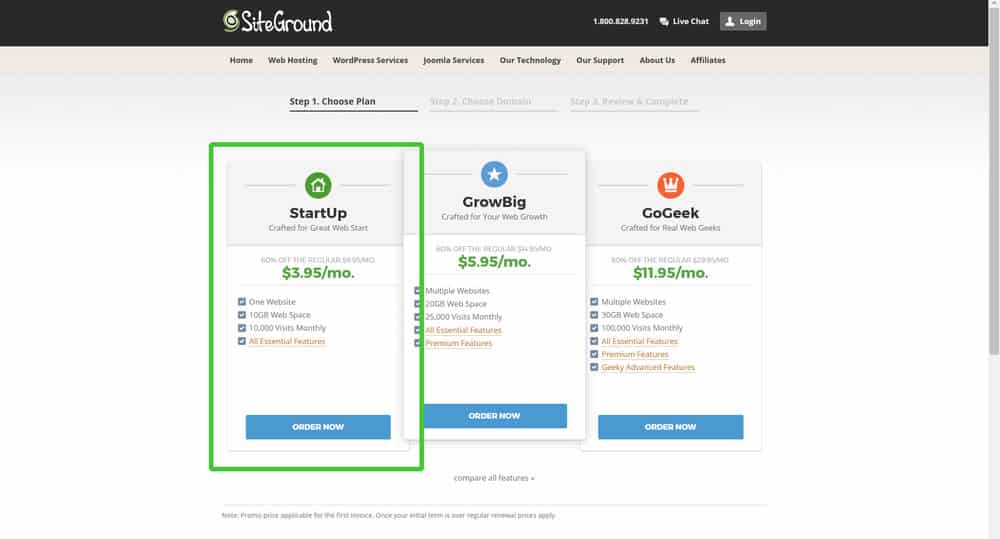
Since your traffic will be low to start out, the StartUp Plan will be more than enough for you to get started. As your blog gets bigger, you can upgrade your service, but for now, you don’t need to waste any unnecessary money.
Your next step will be to get a Domain Name for your blog. You’ll be at a screen that looks like the one below. Enter a domain name that you like and SiteGround will tell you if it’s available.
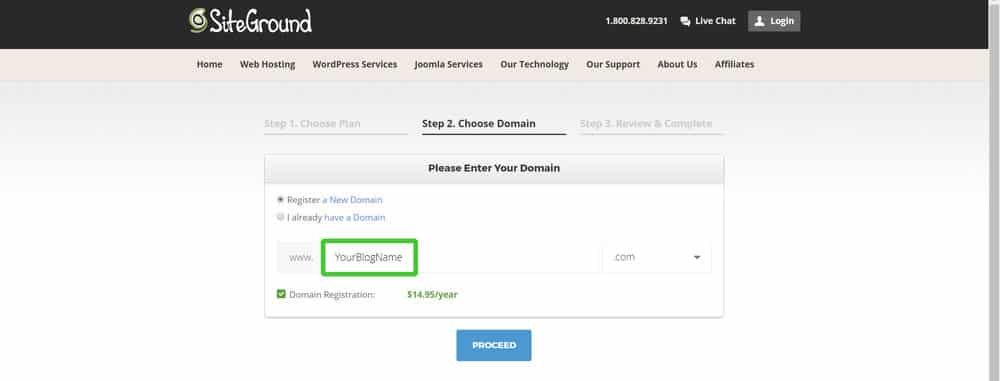
Once you find a domain name, you’ll register the name through Siteground. It’s really important that you buy your domain name through SiteGround. It makes it much easier if you have your web host and your domain name under the same company. If you have your domain name with one company and your web host with SiteGround, it makes it much more of a pain to get things done.
Buying the domain name is cheap. It’ll only cost you $14.95 per year to register the domain name. That’s pretty much inconsequential – anyone can afford that.
The key is to make sure you choose a name for your blog that you like because you don’t want to have to change this later.
After you’ve picked out your domain name, you’ll end up at a screen like this one:
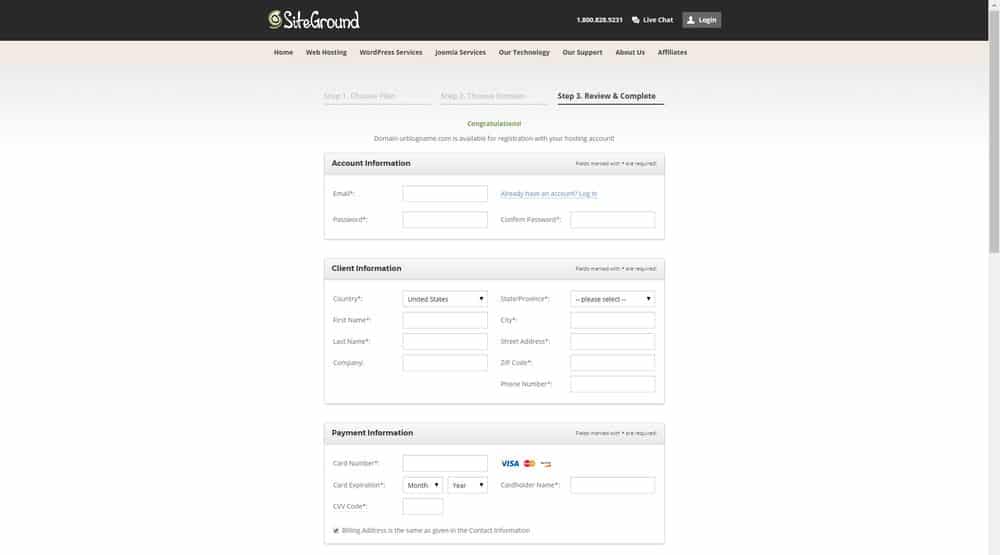
Fill out all of the information.
Next, fill out the purchase information as shown below:
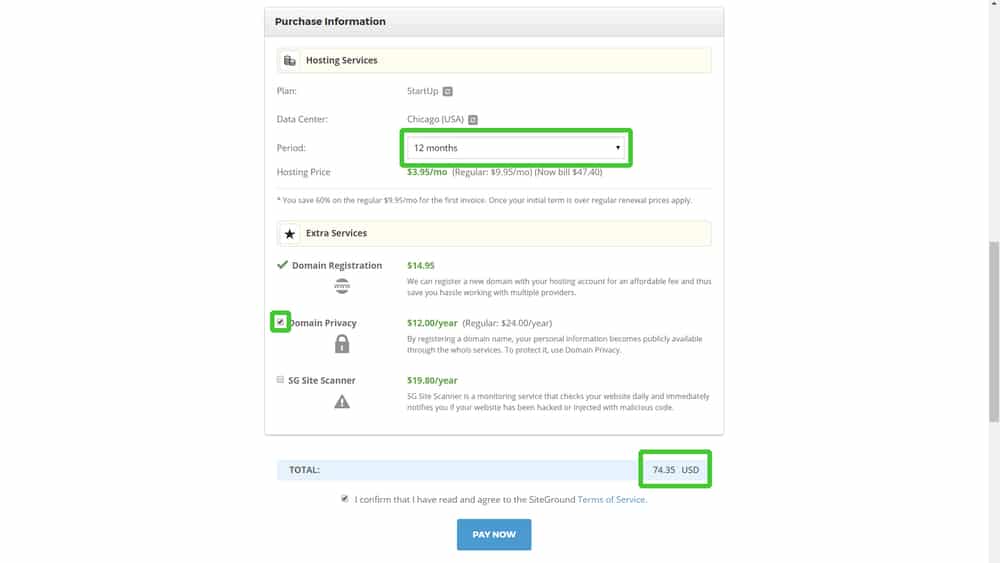
You’ll need to choose how long you want your web hosting for. I suggest choosing the 12-month plan, which is the shortest plan you can get. It’ll be cheaper if you get a longer-term plan, but personally, I think 12-months is a good enough time to see if blogging is something you really want to do.
The Domain Registration fee is required at $14.95 for the entire year. That’s what will get you your blog URL.
In the next line is an option for Domain Privacy. I recommend signing up for this. It basically hides your personal information so that random people can’t look you up and find your name and address. It only costs $12 for the whole year, so it’s definitely worth ticking this box.
The last thing to consider is whether you want to sign up for added security with SG Site Scanner. I personally don’t think you need to worry about this when you first start out. WordPress (which we’ll discuss later) offers a free service called Jetpack that should be enough to keep your blog safe.
And that’s it. With that, you’ve now got your Web Host and your Domain Name. You’re 2/3rds of the way to a full blog.
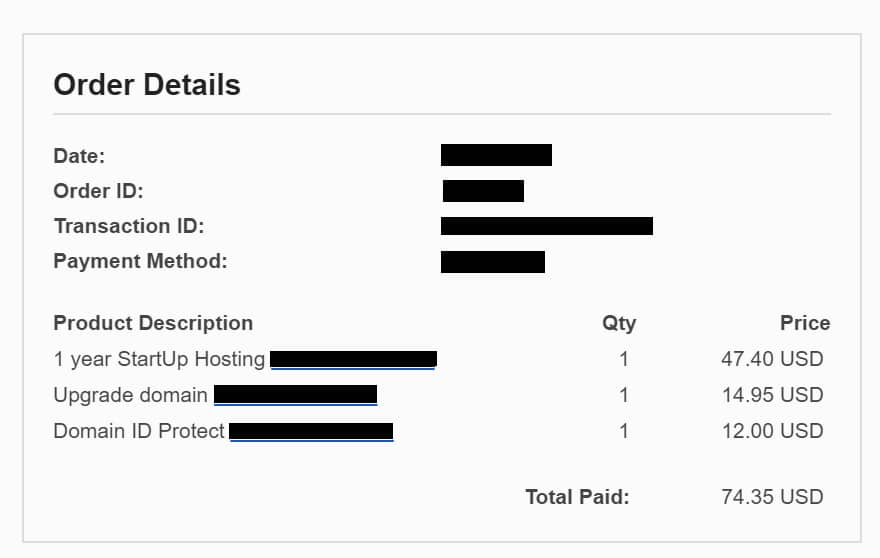
Here’s a full breakdown of your first-year costs:
- SiteGround Registration: $47.40 for a 12-month plan ($3.95 per month)
- Domain Registration: $14.95 for 12-months (~$1.24 per month)
- Domain Privacy: $12 for 12-months ($1 per month)
Altogether, your first year of blogging will cost you a grand total of $74.35 or a whopping total of $6.19 per month. And in exchange, you now own your own media platform and can call yourself the editor-in-chief of your burgeoning media empire.
Once you’ve gotten through the blog signup part, you should see a confirmation page that looks the one below:
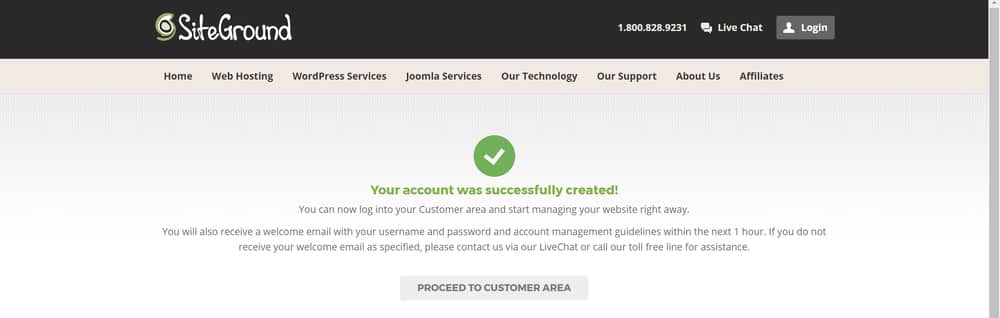
Click the Proceed To Customer Area button to begin the next step of the blog set-up process.
Step 3: Create an Email Account For Your Blog
You don’t need to, but some people like to have a custom email address that looks something like this: Name@YourBlogURL.com.
If you prefer to just create a Gmail address for your blog, then you can skip this part and the bonus section. I actually just use a Gmail address for my email communications, but some people prefer to have a custom email address, so I thought it made sense to walk through that process here.
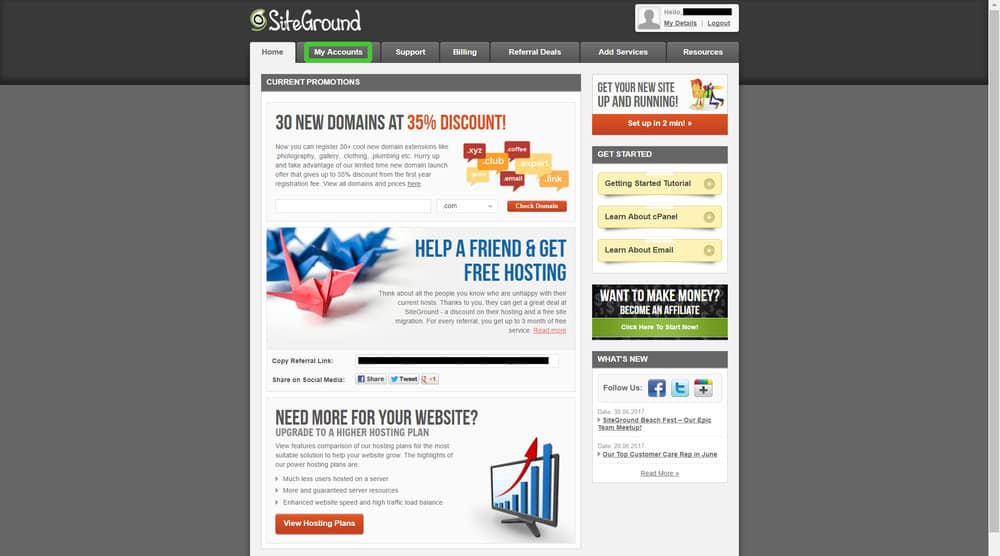
Now that you’ve got your SiteGround account set up, you can now see your SiteGround home screen. Below is what the home screen for your SiteGround account will look like. Click on the My Accounts tab.
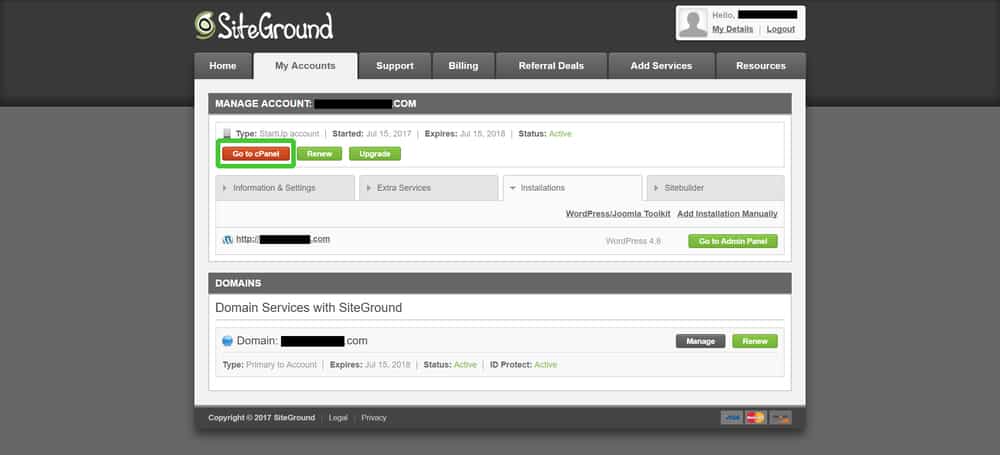
From here, we will need to go into your cPanel. Click the Go to cPanel button as shown in the below picture:
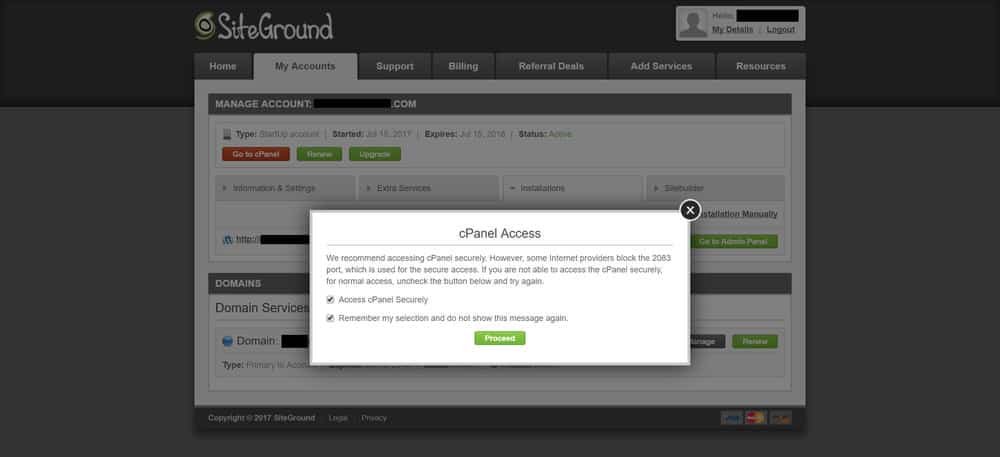
You’ll see a warning on the next page. The warning comes up because this is where you can access all of your website files and make other changes to your site. It’s not a place most beginners will want to mess around in, but we’re only going in here to set up your custom email address. So click Proceed as shown below:
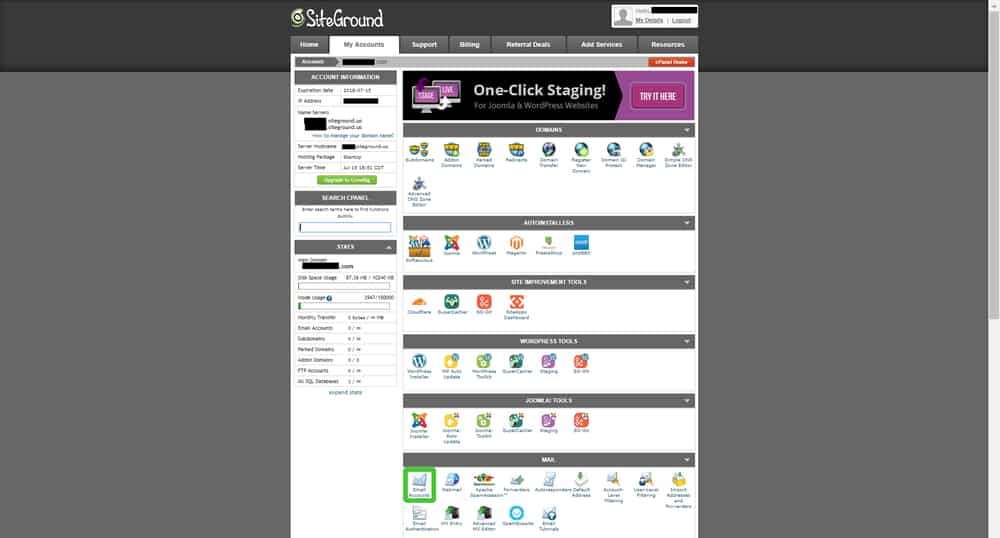
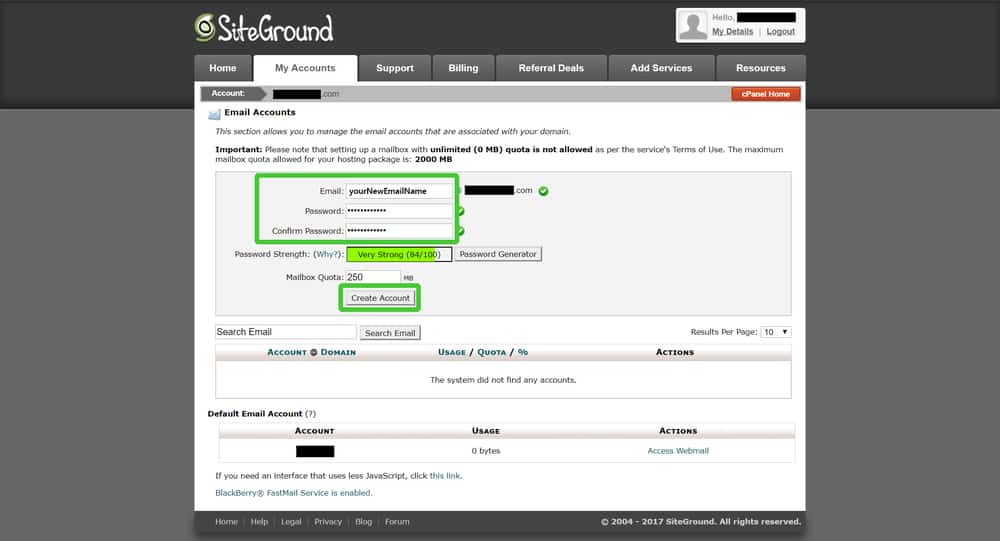
Once you enter your cPanel, click the Email Accounts button which should be under the Mail section. It’s highlighted in green in the below screenshot:
Fill out the Email, Password, and Confirm Password fields as shown in the screenshot below. The Email field will be what you want your email name to be.
A lot of blogs use their first name. So, for example, I would put Kevin in the Email field, and my Email would be kevin@financialpanther.co.
Choose your email name and password and click Create Account.
Next, we’ll want to create an email forward. The email clients that come with most blogs are pretty awful and SiteGround is no exception. What we want to do is make it so you never have to use SiteGround’s email client.
Instead, we want to forward emails that go to our custom email address to our personal email account.
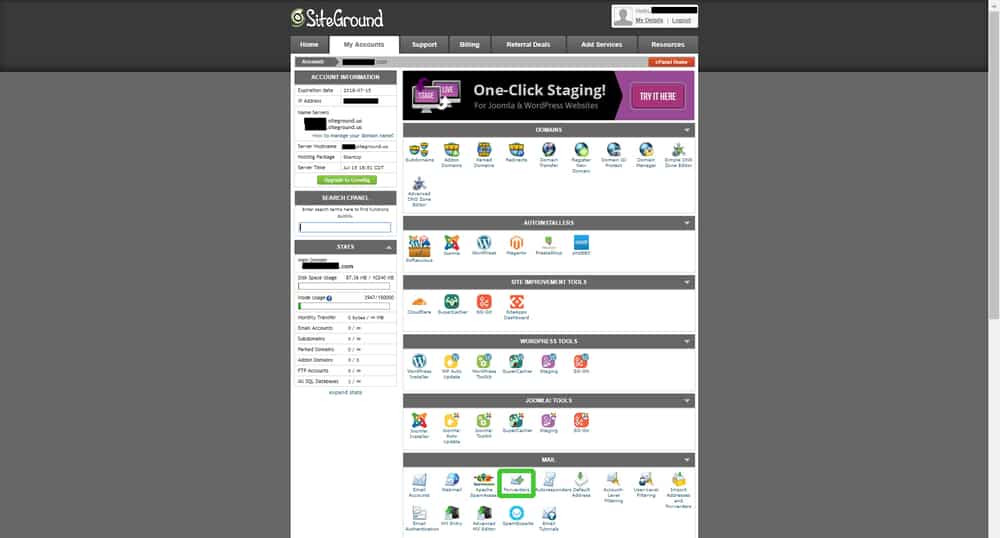
Click the Forwarders button which should be under the Mail section as highlighted in the below screenshot:
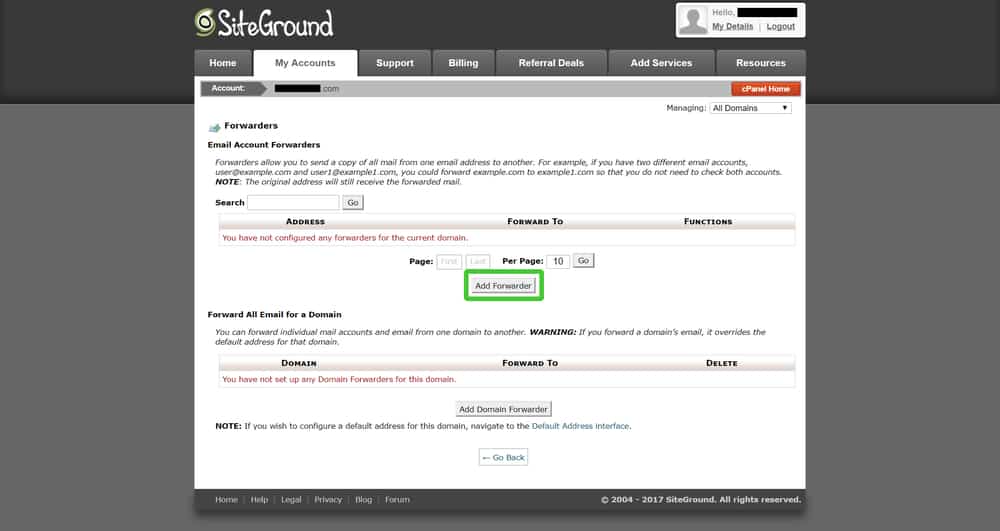
Next, click Add Forwarders:
You’ll then see the below screen:
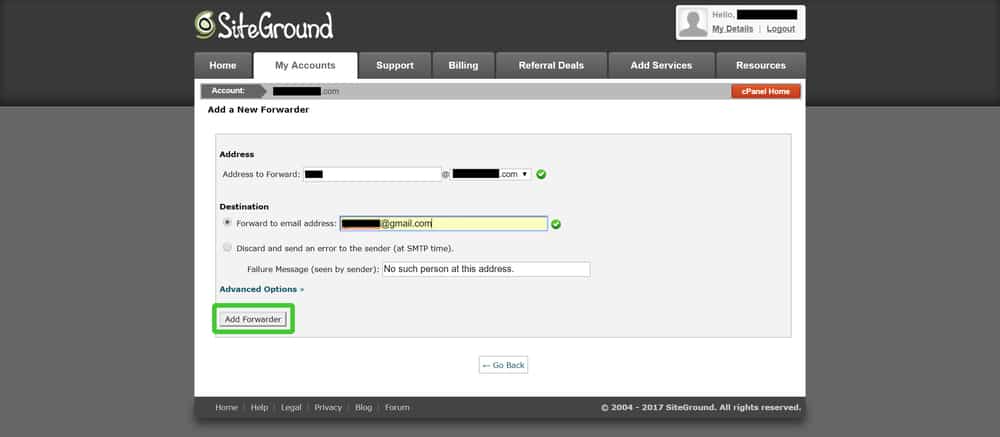
In the Address section, you’ll want to put the email you just created for your site in the Address to Forward field.
In the Destination section, you’ll want to make sure the Forward to Email Address button is checked, and then add the email address that you want all your blog emails to go to. For me, this would be my own personal Gmail account. In Gmail, you can then create a label and have all emails coming to your blog email go into this folder.
Finally, click the Add Forwarder button and you’re done!
To learn how to send emails from your email account through Gmail, look for the bonus section that follows Step 6.
Step 4: Link Your Blog to WordPress
After you have signed up for an account with SiteGround, you should get an email with your order details as follows:
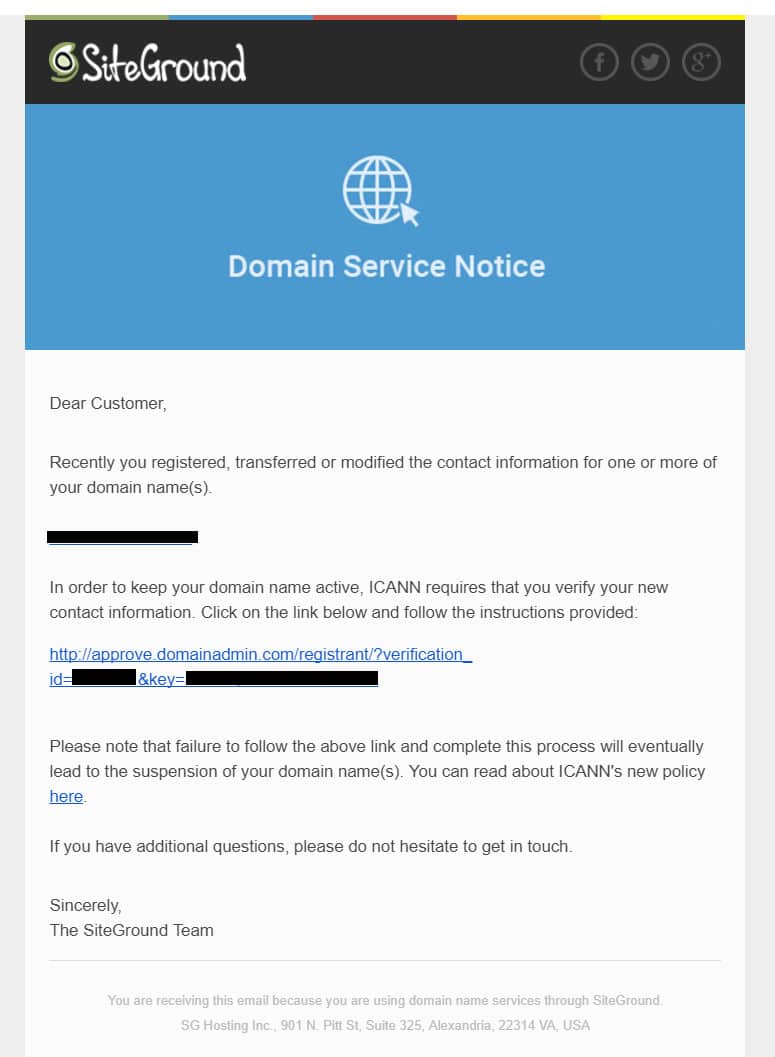
You should also get an email like the one below asking you to verify your domain. Click the link to continue.
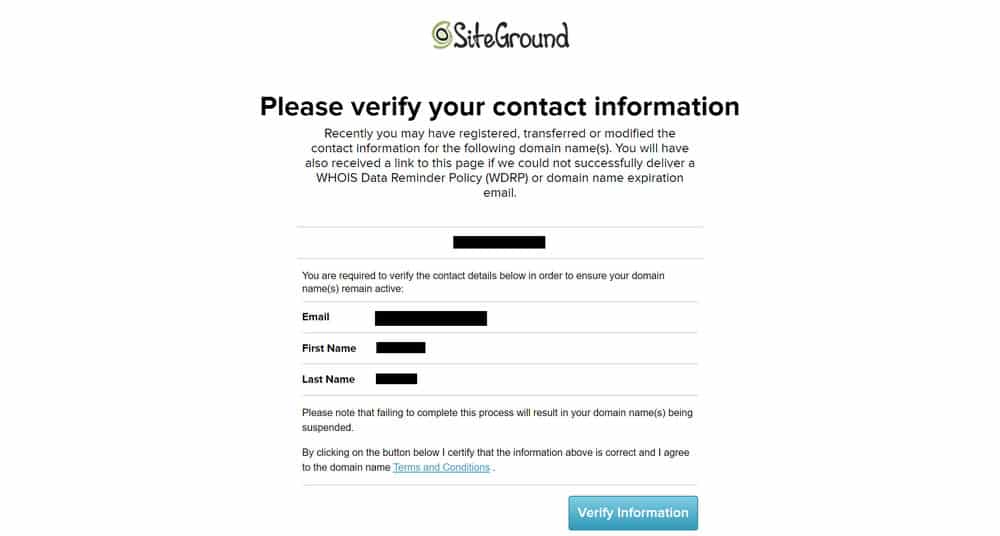
The link from your email should send you to a page that looks like the one below. Fill out the information and then click Verify Information.
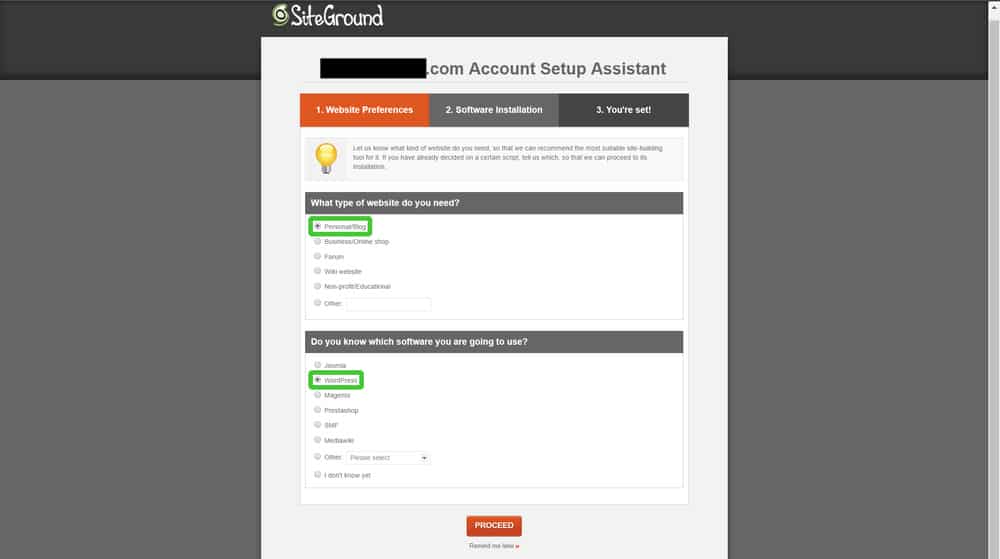
You’ll then be at the Account Setup Wizard screen shown below. We’ll want to start a new website and have SiteGround help us set it up.

In the first step of the Account Setup (shown below), you will choose your Website Preferences.
In the “What type of website do you need?” section, select Personal/Blog.
In the “Do you know which software you are going to use?” section, select WordPress.
Then click Proceed.
The next section will be Software Installation. What we need to do is get the last part of our blog going – the Content Management System. In this case, we’ll be using WordPress, which is, bar none, the best Content Management System out there. You’ll write all of your blog posts using WordPress.
Here’s how we’ll do this.
There will be a section called “Choose Login details for WordPress”. Make sure you fill this section out.
For Admin Email field, you can put the email of your website we set up above, or just use your personal email address.
Pick a Username and Password you won’t forget because you will need this to log into your WordPress account.
Skip the section called “Choose a web design template…” We can find a better theme later and I’ll show you how.
Once you’ve done all that, click Submit.

Your WordPress Account should now be set up! You’ve now got all three parts of your blog set up.
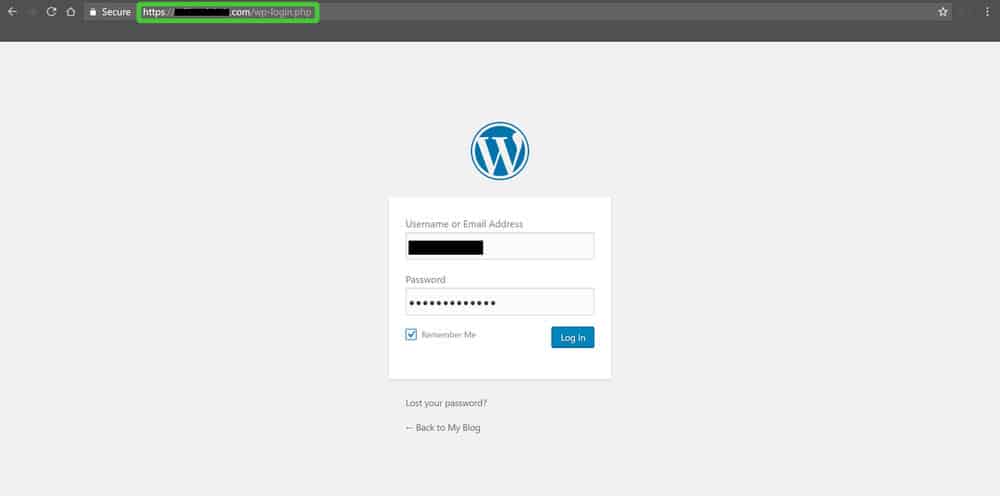
To login to your WordPress Account, you’ll need to type in your domain URL followed by /wp-login.php
So for example, if your domain was www.myawesomeblog.com, you would need to type in www.myawesomeblog.com/wp-login.php in order to log in.
When you reach this URL successfully you will see the below screen. Type in the Username and Password you created in the SiteGround Account Setup Wizard to get access to your Dashboard.
Step 5: Set Up Jetpack For Your Blog
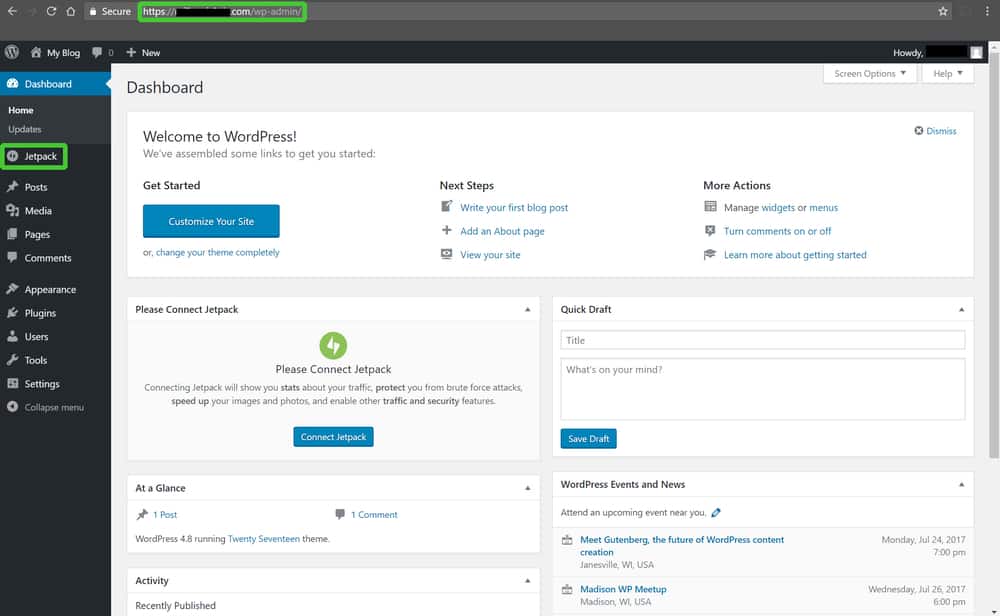
The screen below shows your WordPress Dashboard. This is where all your blogging magic will happen.
There’s a lot that can be done here, but to keep this tutorial short and to the point, I’ll just go over two more things.
The first will be installing Jetpack. You should see a Jetpack tab on the left sidebar towards the top, as shown in the below screenshot. Click that.
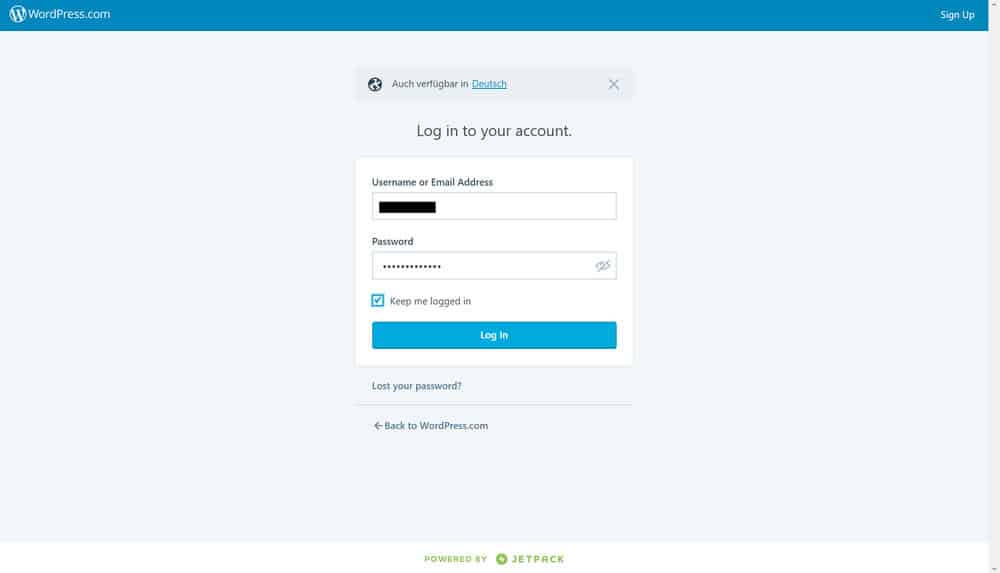
Some of you might not see this next step, but Jetpack asked me to log into my WordPress account again. I might have logged off, or been logged into another Jetpack account, but if this pops up for you, just log in again with your Username and Password for WordPress.
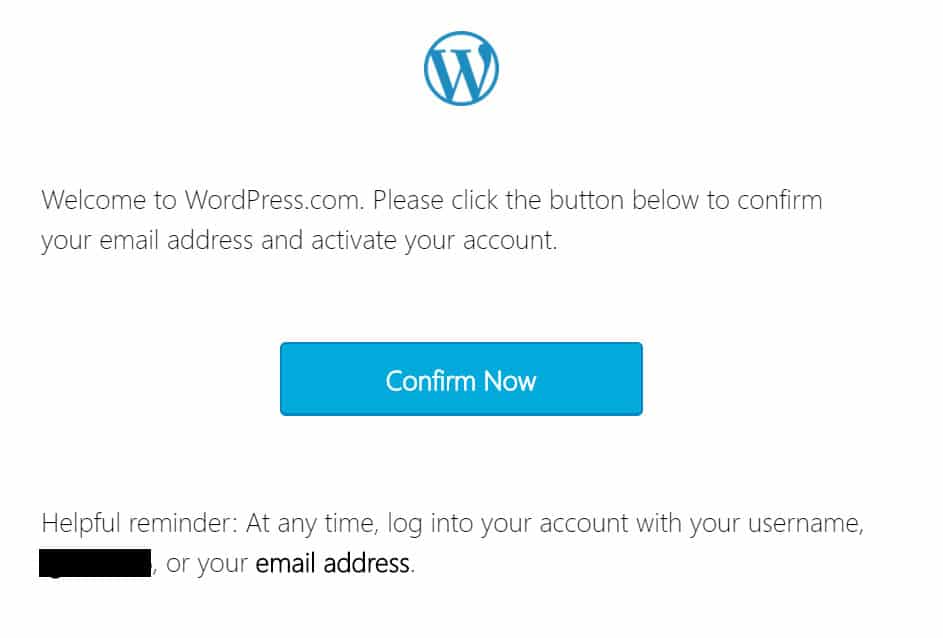
Again, not certain most of you will see the below screen, but if you do, just click Confirm Now.

Once your site is connected to WordPress, you’ll then need to select a plan. The screen to select your WordPress plan will look like this:
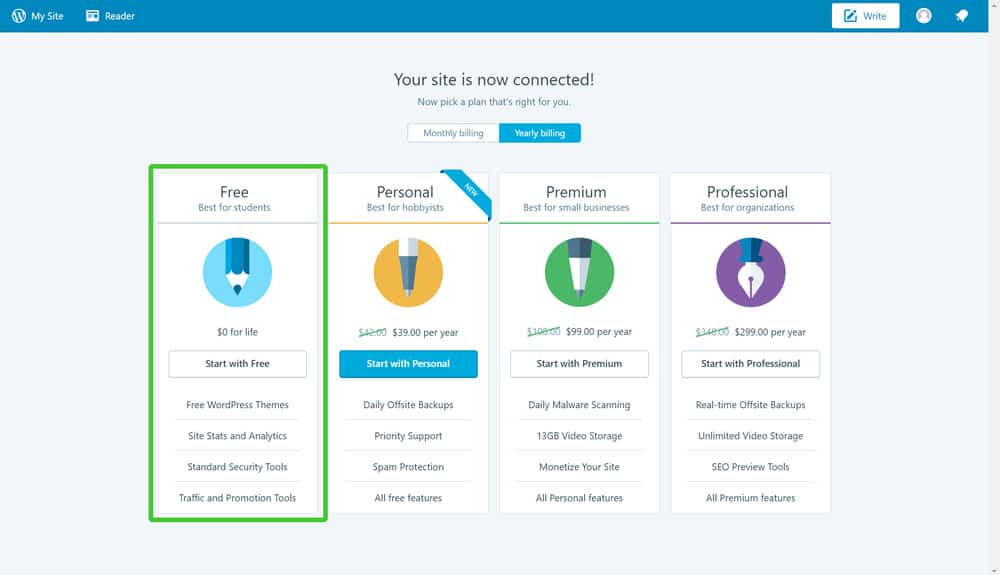
The free plan is pretty good and should have all that you need to get your blog going. It will help with security and give you some basic stats for your site as well.
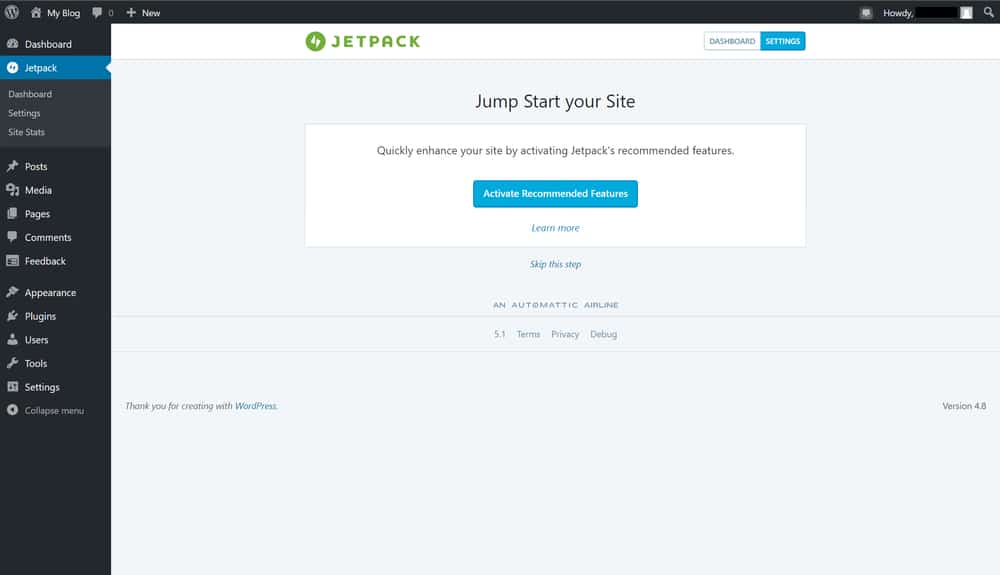
Once you select the free plan you’ll see the below screen. Just click Activate Recommended Features to get all that the free Jetpack plan has to offer. And that’s it!
Step 6: Choose a Theme for Your Blog
The last part of this tutorial will show you how to pick a WordPress theme so that your blog looks cool.
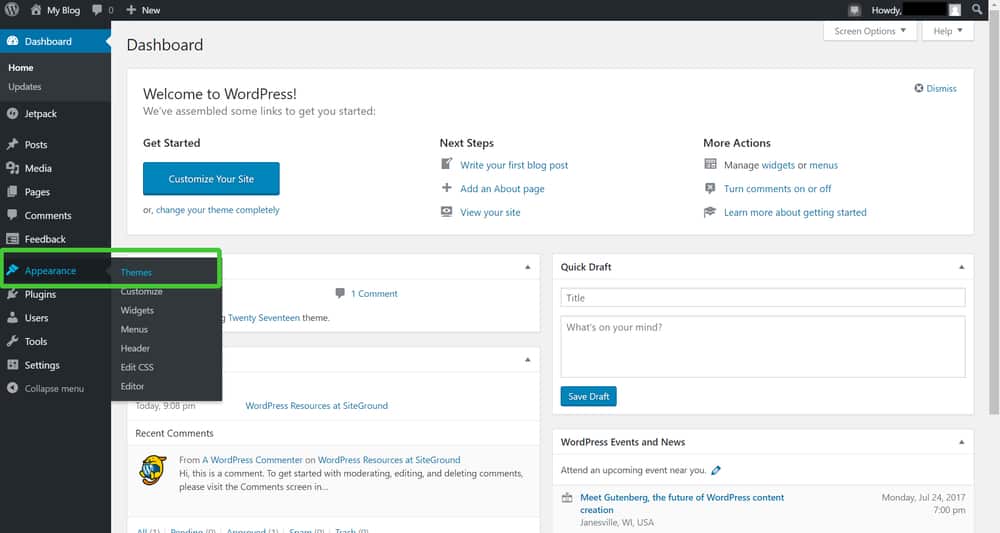
To see all of the free options you have, click the Appearance tab on the left sidebar, and then click Themes.
Once in the Themes section, you will want to click the Add New button located at the top.
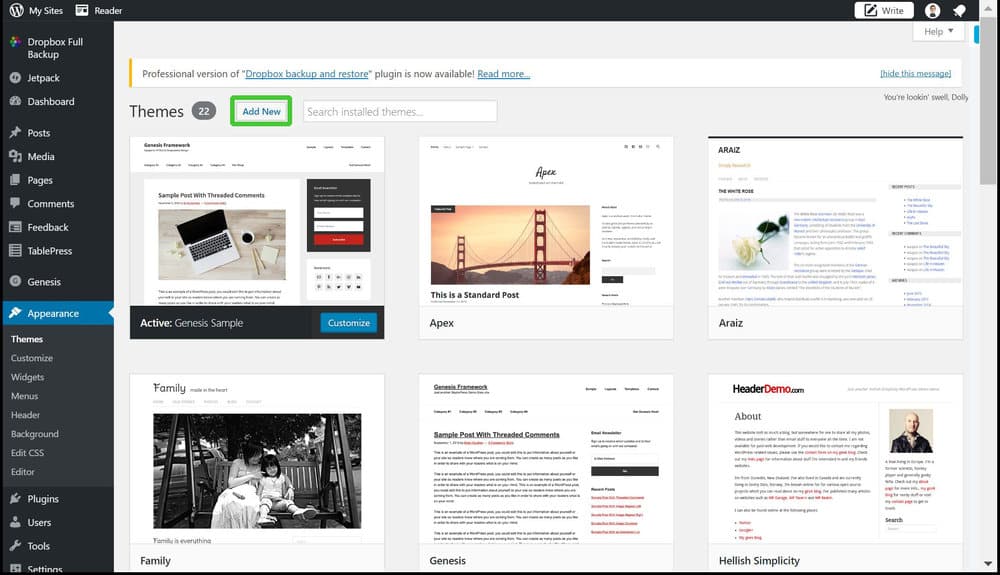
From here, you will see a whole bunch of themes to choose from. My advice is to click the Popular button to sort the themes by popularity.

I highly recommend going with a popular theme when starting out. The reason for this is that you are going to want to add things to your blog and most likely, you will run into some problems that you’ll want help with.
By choosing a popular theme, it’ll be easier for you to search on how to solve these problems for your specific theme. If you pick an obscure theme that no one uses, you might be at the mercy of fixing problems by emailing the theme creator or just having to figure it out on your own.
And that’s all it takes to start your own, legit blog.
This should leave you at a place where all you need to do now is start putting out good content.
Bonus Step: Send Emails From Your Domain Email Through Gmail
One of the things I talked about when setting up your custom email address was setting up email forwarding so that you can receive emails in your normal email client.
In this section, I’ll show you how to make it so that you can send emails from your normal email, but have them look like they’re coming from your blog email address.
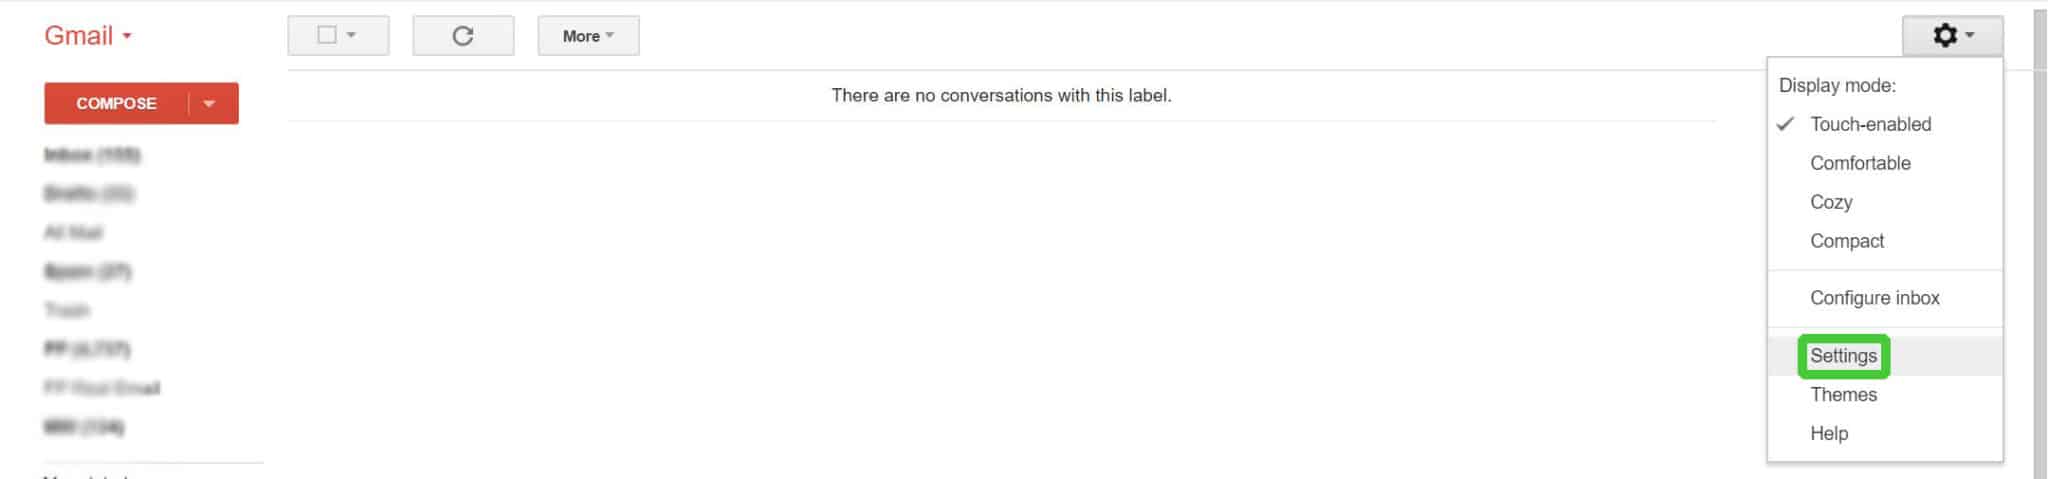
To start, log in to your Gmail account and click the setting gear in the top right. Then click Settings.
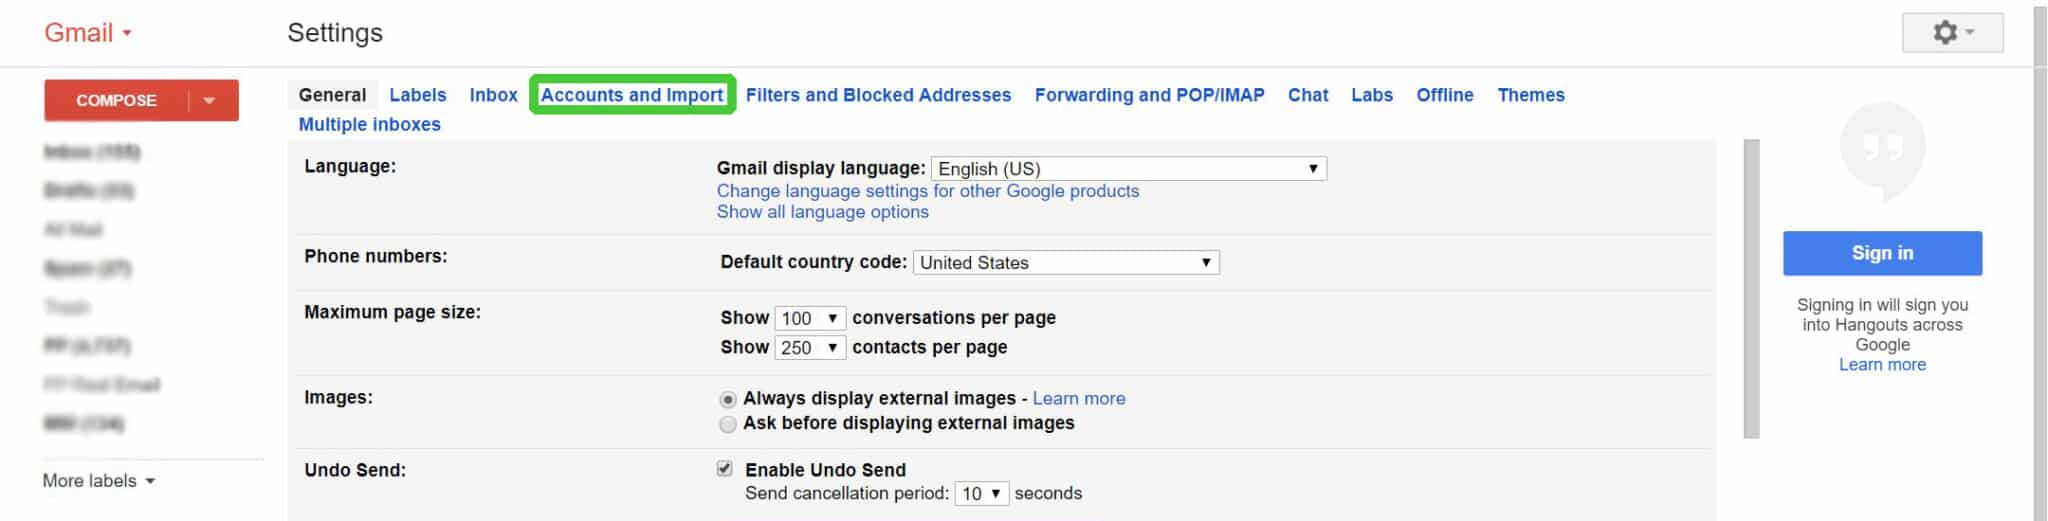
Next, go to the Accounts and Import section:
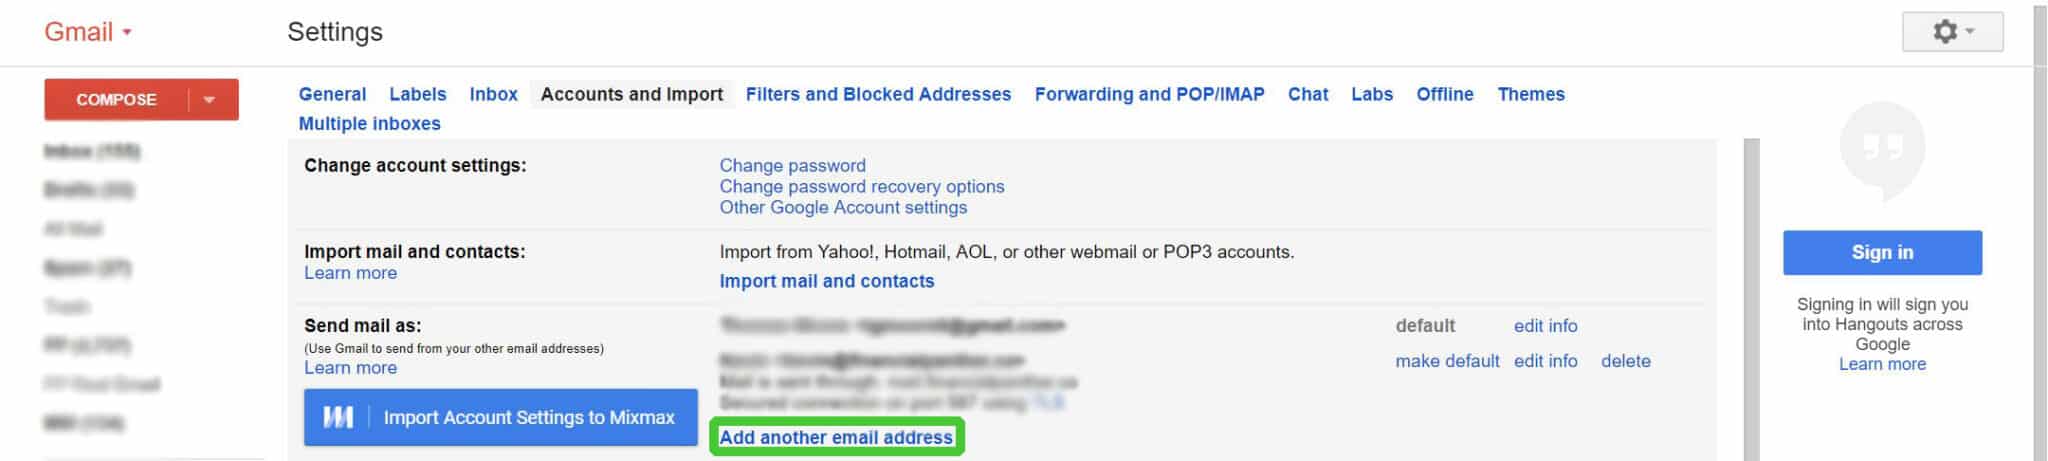
In the Accounts and Import section, look for the Send Mail As section. In this section, click the Add Another Email Address link highlighted below:
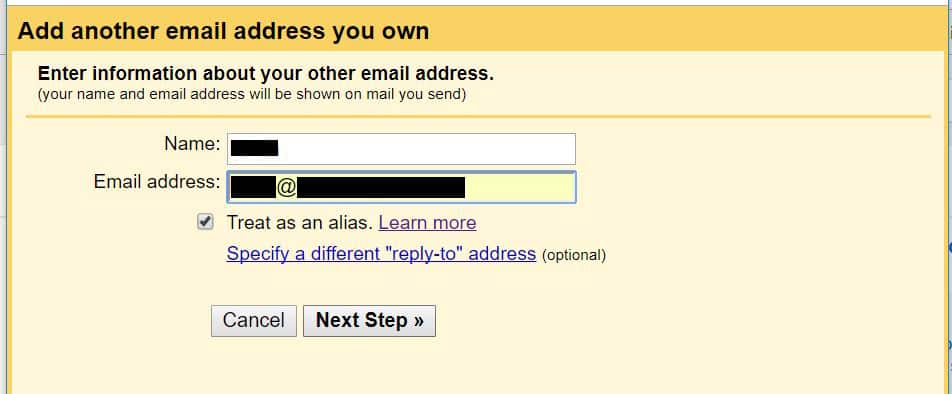
You should see a yellow box pop up. Enter your Name and the New Email Address you just created for your website. Then click Next Step.
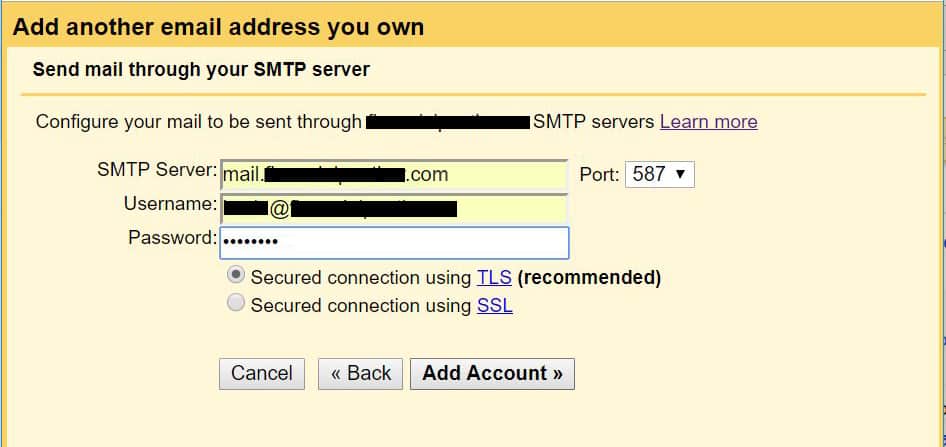
For this next section, you will need to know your SMTP Server. If you followed this tutorial and used SiteGround, then your SMTP Server should be mail.yourDomainName.com (where yourDomainName is your actual domain name).
Your Username and Password will be the email username and password you created for your new site above.
Choose Secured connection using TLS, which should change the Port to the correct number. Then click Add Account.
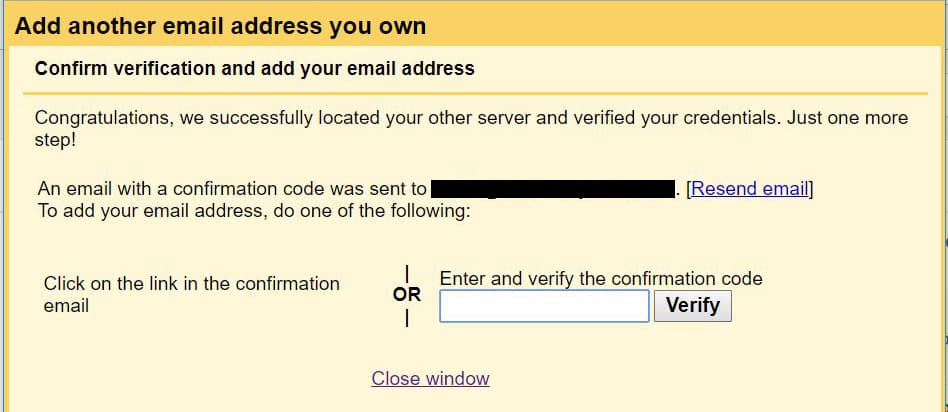
If everything checks out, you will see this screen. It will ask for a verification code which will be emailed to you. Keep this screen up and then go to Gmail.
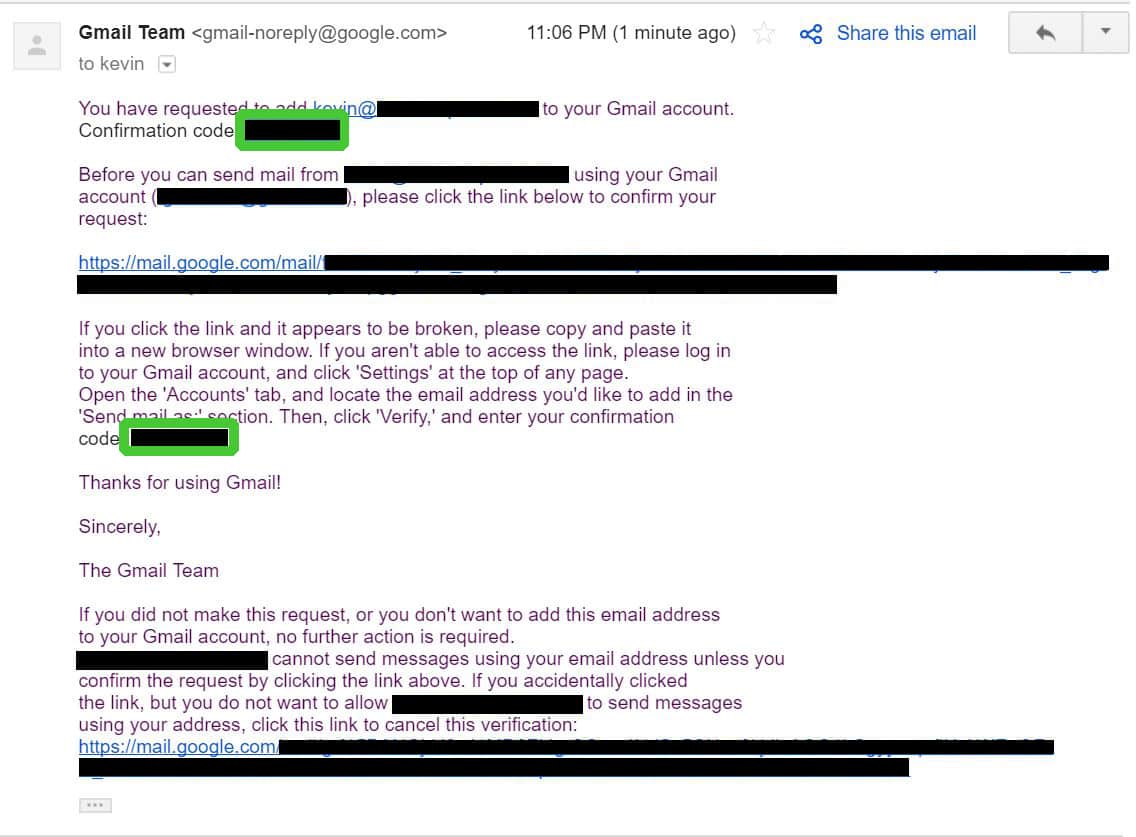
You should see this email from the Gmail Team.

In the email, you should see two places for the confirmation code highlighted in the below screenshot. Copy this code.
Go back to the yellow verification box and paste the code from your email into the box. Then click Verify.
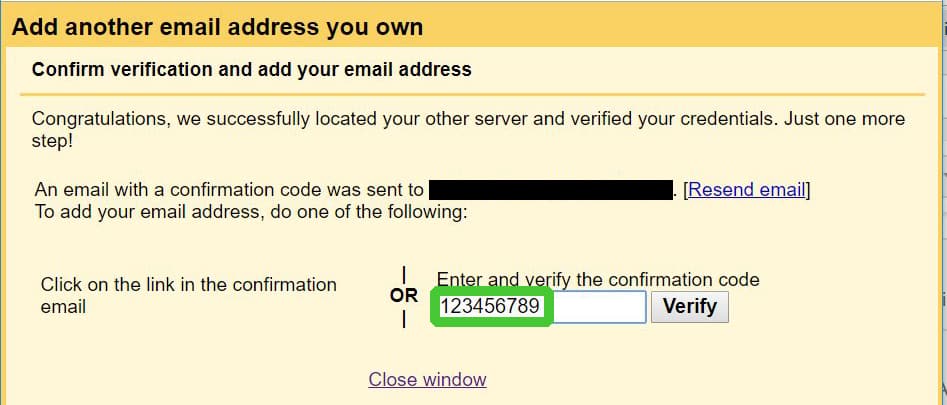
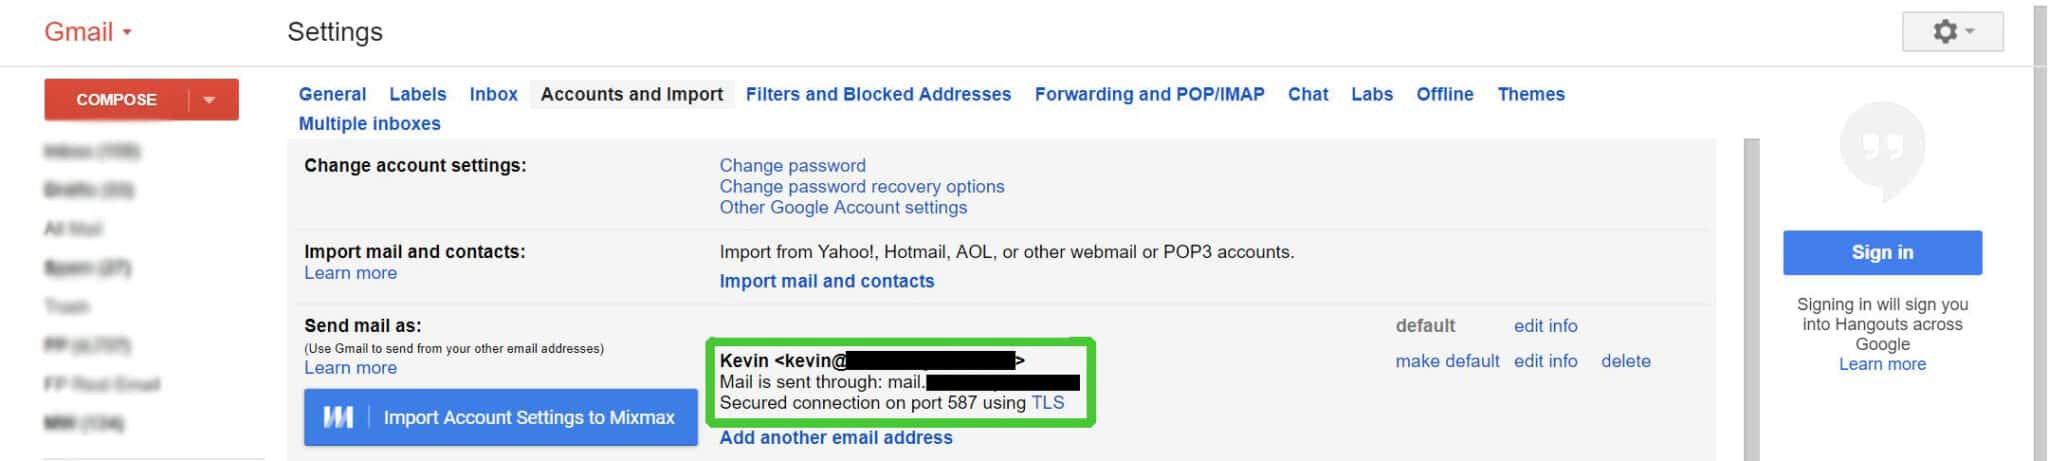
Once you verify your account, you should see something like the below screenshot. This will mean that everything was set up correctly and you are now ready to send and reply to emails using your normal Gmail account.
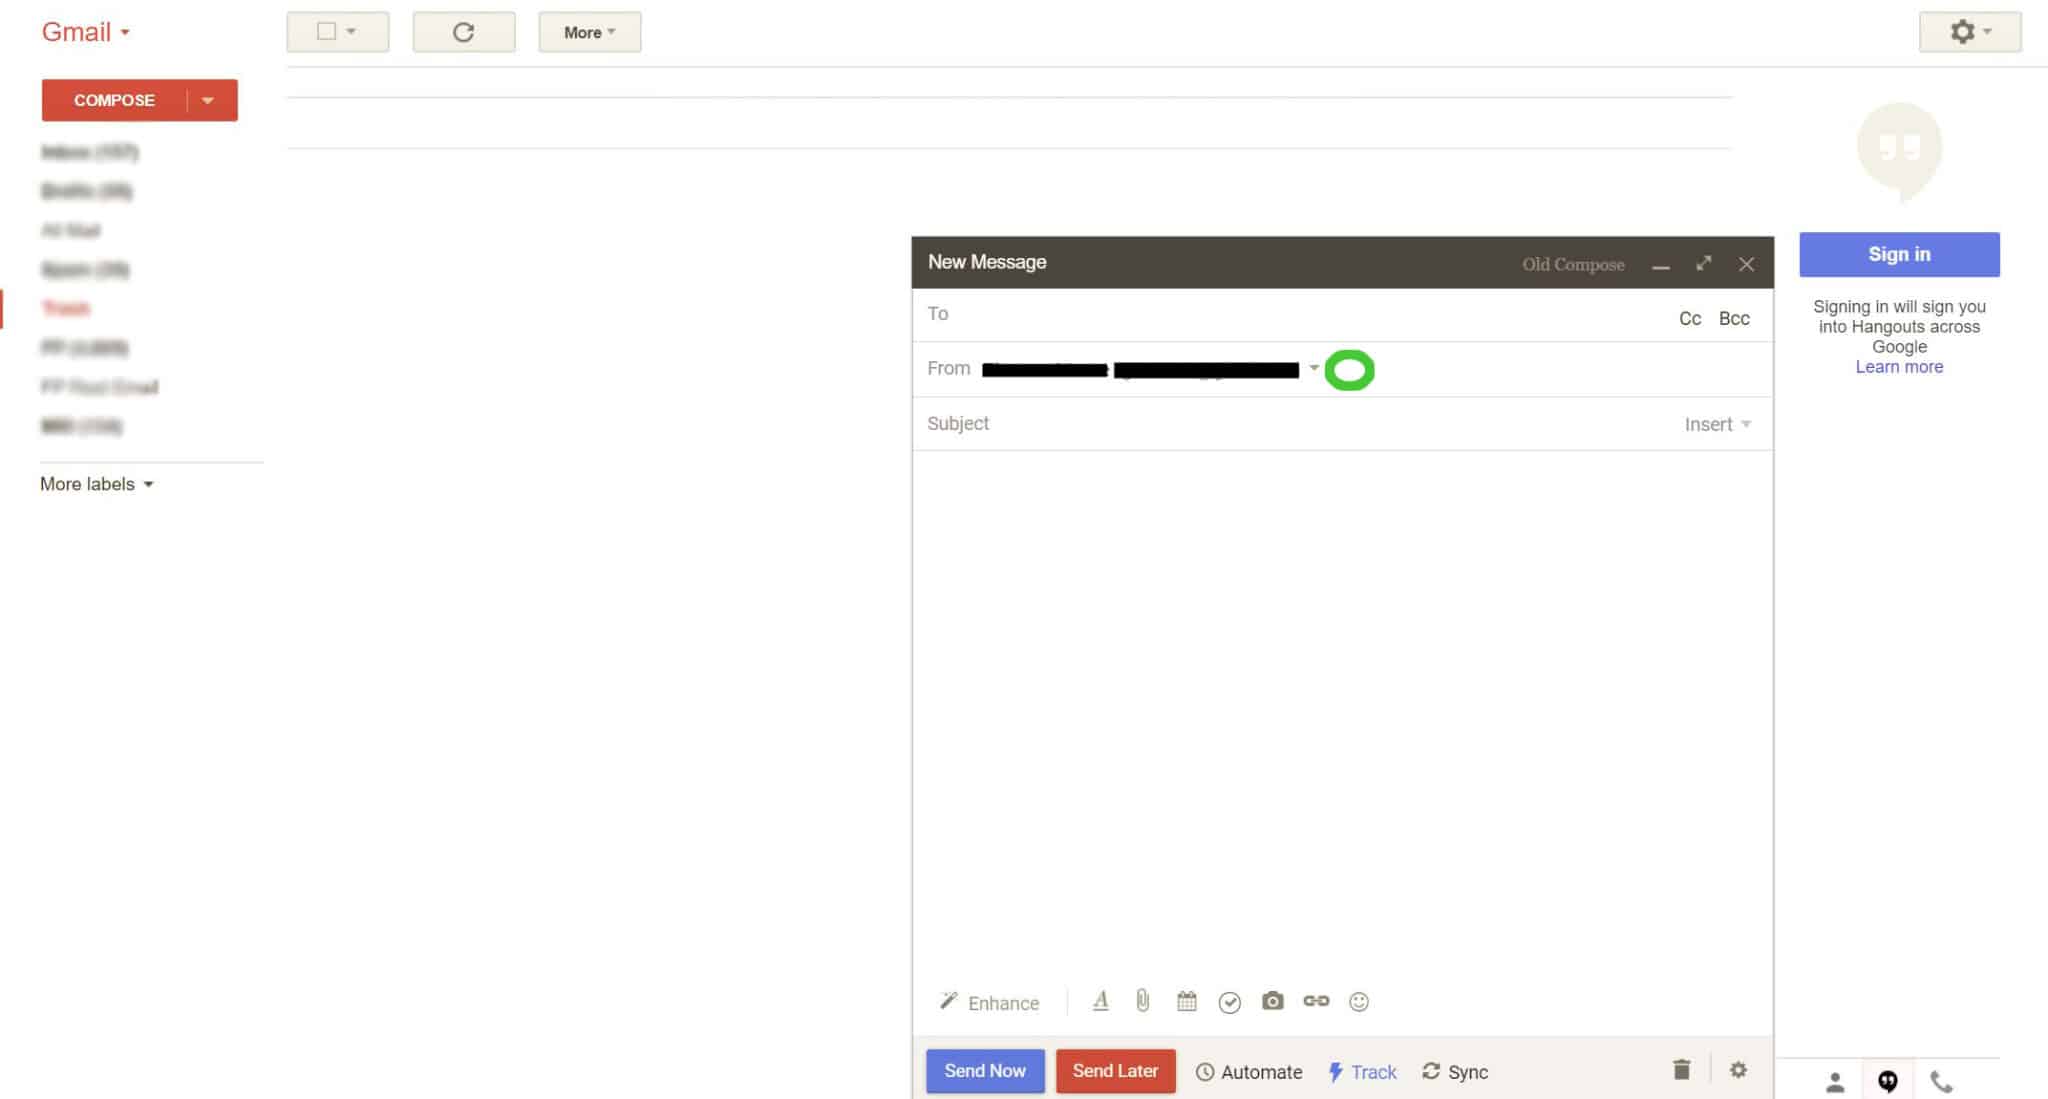
To Send an email from your blog’s custom email address, click compose a new message, and then click to the right of your Gmail address in the From field.
I’ve highlighted where you need to click in the below screenshot:
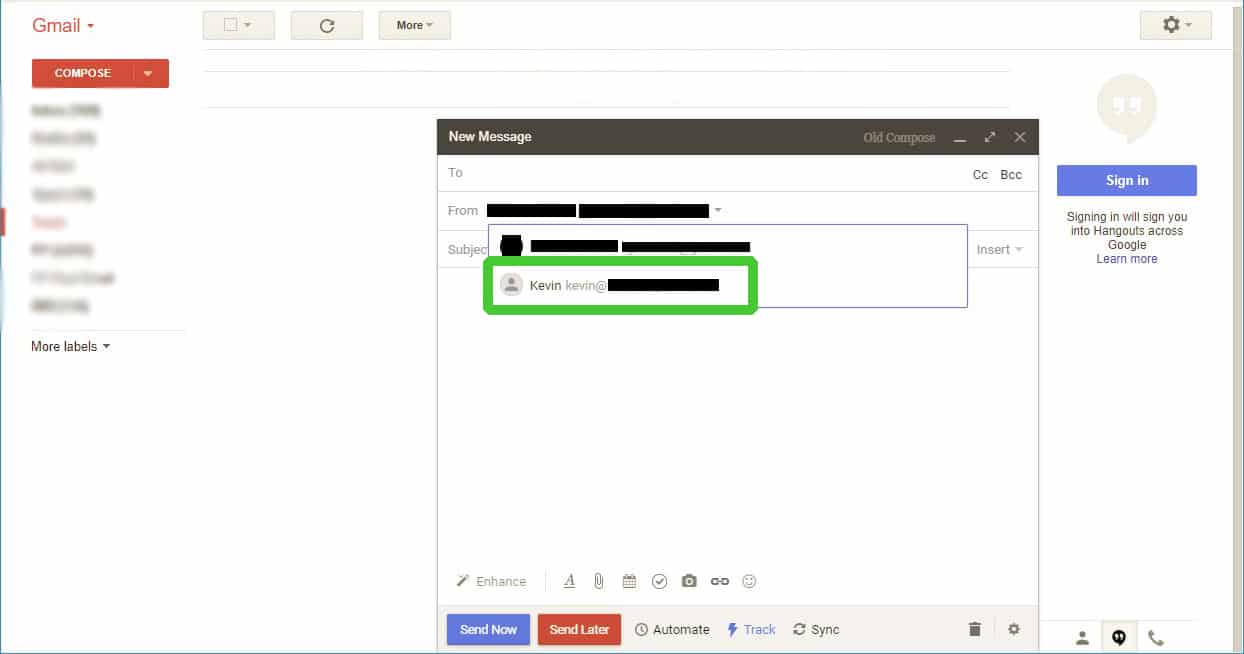
Once you do this, you will see a box come up will all the possible emails you can choose to send as.
Choose the email we just added for your website domain. It should then populate the “From:” field and that’s it! You can now send an email from your custom email address through your regular Gmail account.
The screen below is just demonstrating how to reply to a forwarded email you receive from your website email. Click the green circle area to bring up the options again.
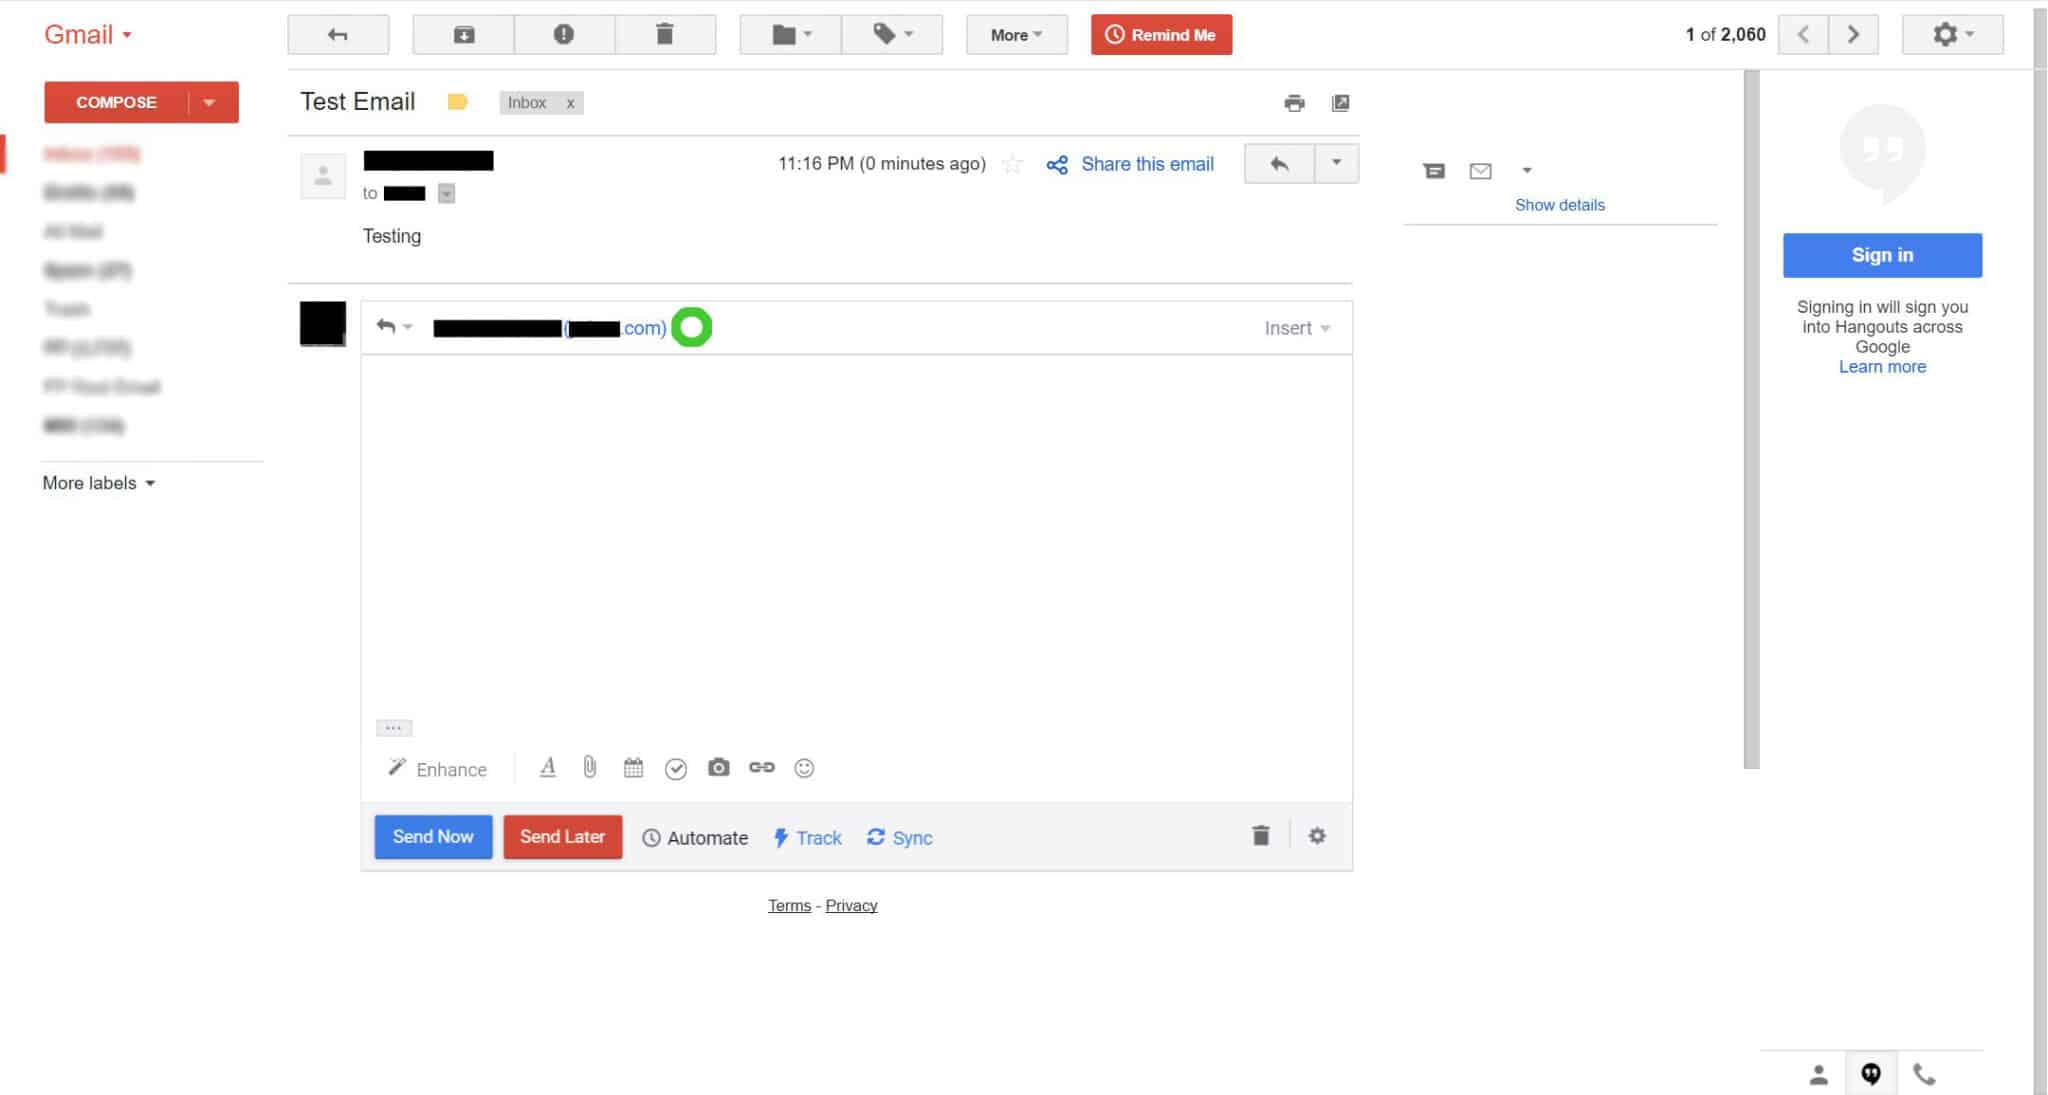
And then choose your website email so that you can reply to the email as if you are sending it from your blog’s custom email address.
This should hopefully save you a lot of time and make it so you never have to enter your blog’s email client.

Conclusion
Starting a blog can be confusing. It’s not going to be a walk in the park, so be prepared to dedicate time to understanding all this stuff. The good thing is that people like me have already done this for you. All you need to do is follow in our footsteps.
Once your blog is set up, you’ve got a few things you need to do if you want to have a successful blog:
- Write good content! There’s absolutely no way around this. Content is king. You have to write good stuff if you want to have a good blog.
- Write consistently! Nothing will kill your blog faster than to go a long time without writing. It’s going to be hard, but you need to make sure that you keep the content flowing.
- Promote yourself! If you build it, they won’t come – at least not at first. You need to make sure that people know who you are. Go to meetups. Comment on people’s blog posts. Join forums relevant to your topic. The point is, people need to know who you are if you want them to show up.
I hope this post was helpful to you as you begin your blogging journey. Hit me up if you need help. I’ll do what I can.
Regards,
Kevin
Editor-In-Chief, Financial Panther
Hi Financial Panther, i started my own blog with your help! Guys, come check me out at my own FIRE journey, saynotocubelife.com, we can do it!!
Thanks! Good luck with your blog!
Prices seem to have went up. You might want to adjust the rates but thank you for your clear directions for starting the blog. Enjoy your site.